Android: Manage Permissions
Page Contents
Open the navigation bar and then click on the Users icon.
Note: You will be able to add a user only if you are an admin for the current company. If you are not an admin then you won’t be able to see the Users icon in the navigation bar.
![]()
Click on the user whose permission you want to change.

You will be shown the permissions the user has.
1. Make Admin
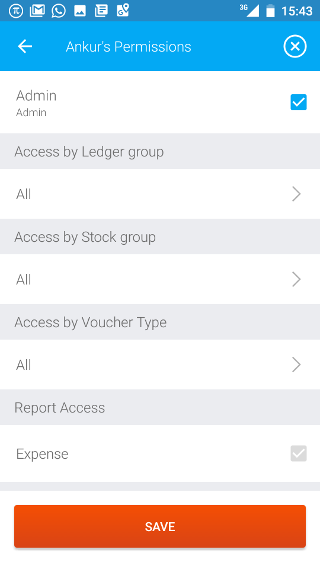
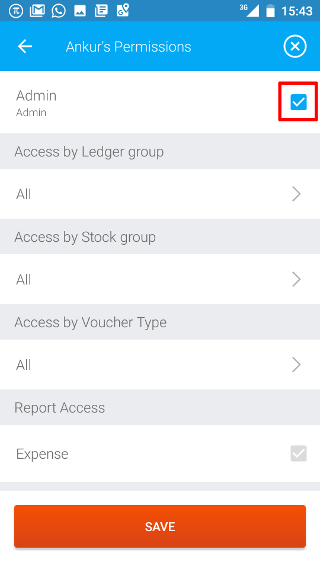
Click on the checkbox to make a user admin. Then click on SAVE. Now the user can see all the data of the company and can even add other users.
You can also remove a user from admin permission by clicking on the same checkbox.
2. Give Only Sales Permission
Click on the All below Access by Ledger Group. By default the user has access to all the ledger groups.
Note: You can give permission to other ledger groups similarly
![]()
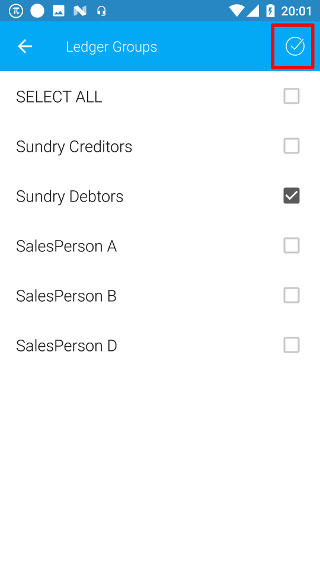
Uncheck SELECT ALL and then click on Sundry Debtors.
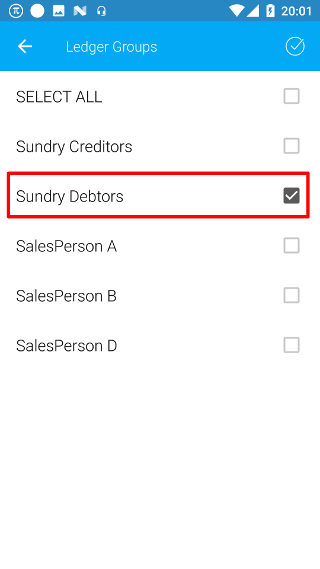
Click on the tick. Then you are taken back to the permissions page.
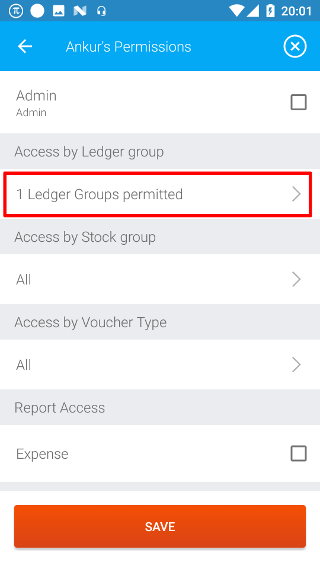
You can see 1 Ledger Group permitted for the user. Click on SAVE so give the permission to the user. Now the user can see all sales ledgers.
3. Give Only Purchase Permission
Click on the All below Access by Ledger Group. By default the user has access to all the ledger groups.
Note: You can give permission to other ledger groups similarly
![]()
Uncheck SELECT ALL and then click on Sundry Creditors.
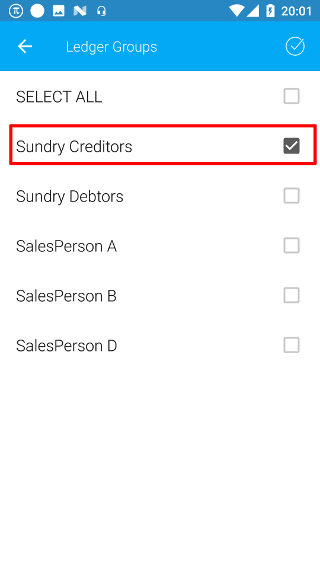
Click on the tick. Then you are taken back to the permissions page.
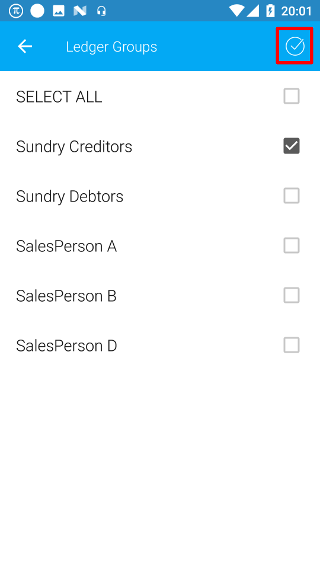
You can see 1 Ledger Group permitted for the user. Click on SAVE so give the permission to the user. Now the user can see all purchase ledgers.

4. Give Stock Group Permission
Click on the All below Access by Stock Group. By default the user has access to all the Stock groups.
Note: You can give permission to other Stock groups similarly
![]()
Uncheck SELECT ALL and then click on whichever stock groups you want to give permission. If you don’t want the user to see any stock groups then, select none of the groups shown.
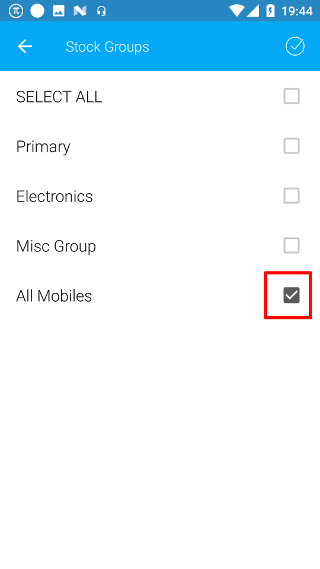
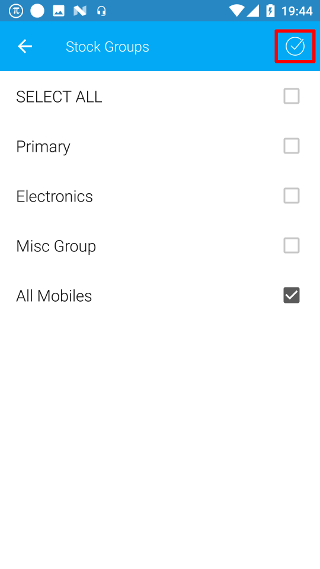
Click on the tick. Then you are taken back to the permissions page.
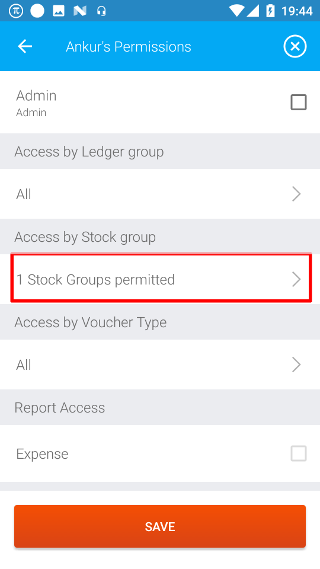
You can see 1 Stock Group permitted for the user. Click on SAVE so give the permission to the user. Now the user can see all Stock Groups.
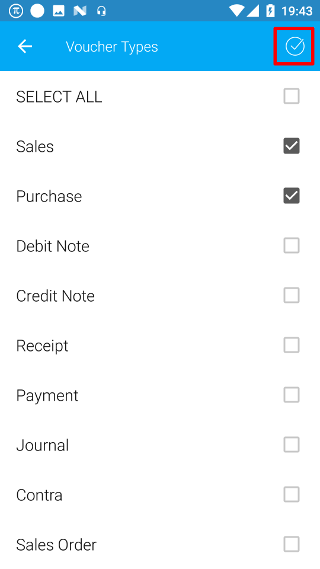
5. Give Voucher Type Permission
Click on the All below Access by Voucher Type. By default the user has access to all the Voucher Types.
Note: You can give permission to other Voucher Types similarly
![]()
Uncheck SELECT ALL and then click on whichever Voucher Types you want to give permission. If you don’t want the user to see any Voucher Types then, select none of the types shown.
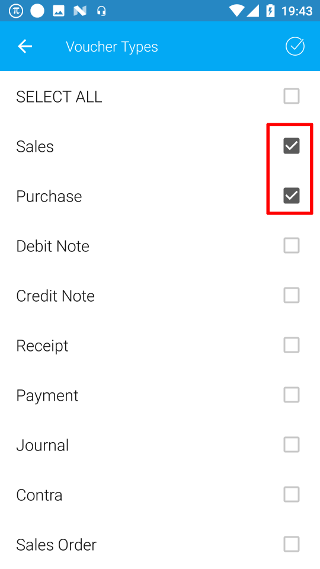
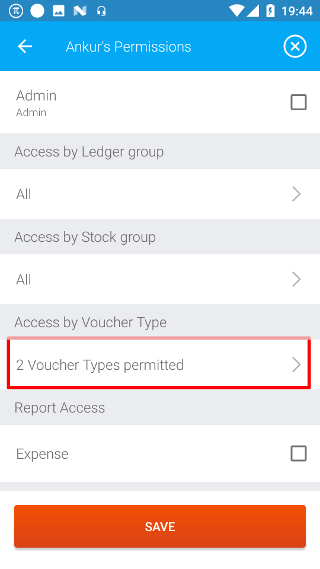
Click on the tick. Then you are taken back to the permissions page.
You can see 2 Voucher Types permitted for the user. Click on SAVE so give the permission to the user. Now the user can see all Voucher Types.
6. Give Expenses Permission
Click on the expenses check box and then click on SAVE. Now the user can access information related to expenses
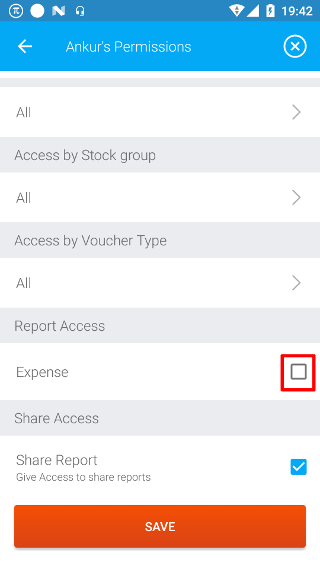
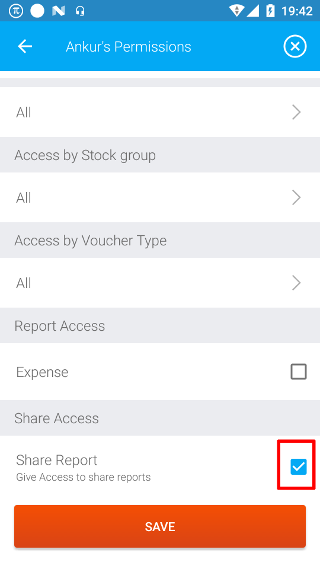
7. Give Share Report Permission
Click on the share report check box and then click on SAVE. If you have not given the permission to share report, the user will not be able to share any of the reports in the app. The user can still, share invoices and bills.
